


In Part 2 we will pick up where we left off in “Portraits”- Putting All The Parts Together-Part 1 and complete the steps to finish the Portrait of Marilyn Monroe. You may wonder why there are three images of Marilyn Monroe when I am drawing only one Portrait of her? As an Artist, you have the freedom to make choices when drawing a Portrait. The one exception to this “creative freedom,” would be if you were commissioned to draw a Portrait, for a client, using a photograph provided by them and a request to have it drawn a particular way. I liked particular parts each of these photographs offered and decided to choose the different characteristics and combine them. Using my skills and “creative freedom” as an Artist, I drew my own personal Portrait of Marilyn Monroe. I will begin this lesson with the picture we left off at in Part 1.

After completing the steps in the previous class, the Facial Features were finished so I lightly sketched the Hair and the Ears. It’s now time to begin Step 1 to complete the Portrait.

Step 1– Begin shading in Values in the Hair. Refer to my previous post, “Drawing Hair” to get more details. Make sure you are holding your pencil correctly and shading in with wispy, feathered strokes.


Remember to use a Stump and a Brush to darken and soften the Hair. Highlights can be pulled out by a nicely shaped Kneaded Eraser. Remember to clean your Kneaded Eraser often, as well as your Stump and Brush. Use your pencil for the fine hairs closest to the head.


When I was sketching her hair, I wanted to combine characteristics, I liked, from the hairstyles in the three reference photographs of Marilyn Monroe. The first hairstyle transformed into the second, and the second into the final Hairstyle I chose for the Portrait. Notice how the final steps of the Portrait (The Shape of the Face, Chin, Ears, Neck, and Hair) come together simultaneously. The reasoning behind this approach is each characteristic is dependent upon each other through Value.


Step 2- Fine tune the details of the Ears. Refer to my post “Drawing Ears.” Each Ear is different, don’t make the Ears clones of each other. Refer to your photograph, using the “Check Back Method” often. Notice how the outline on the outside of the Ear is formed, not by Line, but by the Value of the Hair. Remember when you connect the Ear to the Head, there is no Line, just precisely placed highlights and shadows defining the parts of the Ears that are visible in the angle that is seen. Use your eyes, not your memory, and constantly hold up your Portrait to compare it to your Photograph.

Step 3- It is important when you begin the Chin that it is not drawn, but created by Value. Value defines the form of the Chin and Jawline, by the Highlights and Shadows it Casts and the Contrast of the Neck.

Step 4- Adjust and fine tune the Values on the Face. Make sure you look at your Portrait and Photograph side by side and compare the two. Step back and evaluate your Portrait from a distance and make corrections.
TIP– Sometimes working on a piece of Art for too long, will have a counter intuitive effect. Fatigue will cause you to lose focus, make mistakes, and miss important details. Taking a break can actually generate breakthroughs in your Artwork, by looking at it with a new set of eyes and a fresh perspective.

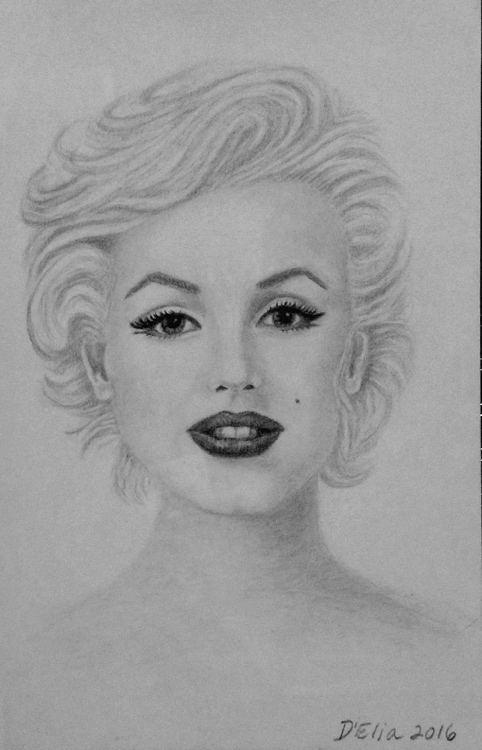
Step 5- Adjust the shadows on the neck. Fine tune the details and the Portrait of “Marilyn Monroe is complete.